CLICK HERE FOR FREE BLOGGER TEMPLATES, LINK BUTTONS AND MORE! »

Monday 28 February 2011

A sad post

Sadly today, my best friends Mum died of cancer.
So please take this message as a kick up the bum to make sure you tell those you love just how much they mean to you.
Hugs
H xx

Sunday 27 February 2011

Doodle Dragon and Cute Card Thursday Challenge card

Well today see's the re-launch of Doodle Dragon Studio's challenge.  The challenge will now be run from the main Doodle Dragon Blog and not the challenge blog.
The challenge is titled Spring is in the Air.
Here's what Dustin has to say about this challenge "  You get to make a project or card using spring colors, my images that represent spring to you, or even better...combine them.  I can not wait to see what you come up with"
There's a new points system for the new challenge, and this post explains it all.
I have combined my entry with the Cute Card Thursday challenge.  This week they have a really nice sketch designed by the design team member Christine.  I loved using this sketch that I'm sure you will be seeing it again soon.
Here is the sketch:


This morning I was watching a you tube tutorial by the talented Marlena this morning and I've her tri-fold card idea for this card.
This first photo shows the front:


Here's the first fold :


And here's the inside :


The image is from the Febuary edition of the monthly digi stamp club.  You should check it out as its a real bargain price.
The PP were from a recent trip to Kanban.  The cute bunny is coloured with copics, and has a slight shading of blue chalk ink to represent the sky and he has a shiny nose from glossy accents.  The circle and the shaped circle were cut on my cricut using my accent essentials cart.  The ribbon was from my stash.  The bow was made using my trusty bow-easy.  The 2 pieces of ribbon on the top right are held in place with tiny brass brads.  The pink flowers are punched in pink dew paper using a woodware 5 petal punch and then 2 petals overlapped to make them 3d.  They have pink glitter glue centres and are held in place with silicone glue.
Thanks for dropping on by and I'll see you tomorrow ,
H xx

Friday 25 February 2011

I made the Tiddly Ink top 5!!

Just a quick post to say I made the Tiddly Inks Top 5 for the candle I did for Hubby's Gran.

Now above each challenge badge award I have included links to the cards/candle I won them for.
H xx

Bugaboo and Mojo Monday Challenge Card

Over at Bugaboo stamps they ave released some gorgeous dog digi stamps, which you can find here.
For this weeks challenge is to make a get well card.  I seem to have being using dog images all week so I decided I might as well stay on the same theme and I chose Itchy dog bowl for my image.
Here's my card:


And here's they sketch I followed from Mojo Monday :


I die cut a circle on my cricut then used repo spray to poition it exactly where I printed my image on scrap paper and then fed the paper thru the printer again and it then prints onto the circle.
Itchy is coloured with copic and I used white gel pen to highlight the image as shown by Catherine here.
The green BP has a light hint of brown inked around the edges.
The scalloped circle was cut on my cricut using a Penny Duncan shapabilities die cut.  The cream square was embossed with a cuttlebug folder called snow I think.  The dots were then highlighted with brown chalk ink. 
The netting and ribbon are from my stash, the sentiment is computer generated and finally I coloured white card candy with my e37 copic ciao to match itchy's paws.
Thanks for popping on by, 
Have a great and crafty weekend,
H xx

Wednesday 23 February 2011

A Tiddly Inks card for Sketch saturday and Cute card thursday

Cristy over at Tiddly Inks asked for some tiddly fans to make some cards for her friend's 40th.  This is my card:


Here is the sketch I followed:


The image is Annie's card and she was coloured with copics.  I then used some glossy accents on her shoes and sprinkled glamour dust over the top to give her some sparkle.
The gold panel was embossed with a cuttlebug folder and I used felt fusion down the side.  The card is finished with my usual card candy.
This card is also entered into the Cute Card Thursday challenge where you have to have a card  featuring something nice and shiny. It can be Glossy Accents added to your image, or charms, metal flowers, mirror card, if it's shiny they want to see it!
Thanks for dropping by,
Hugs
H xx

Tuesday 22 February 2011

Tiddly Inks Challenge 39 - Shaker Card Challenge

Last night Mike treated me to A dogs life svg file from My Scrap Chic.  There's a big sale on over there at the moment.  60% off when you spend $10 or more.  Its only on til wednesday 23rd so quick catch the sale before it ends.
And so onto my card .... The challenge over at Tiddly Inks Challenge Blog is to make a shaker card and if you arn't sure on how to do a shaker card they have got a tutorial so you've no excuse not to join us.

Here's my shaker card:


The image is called Girls Best Friend, which is very apt in my house.  She is coloured with copics and is cut out on my cricut using a shaplies file from Penny Duncan Designs.  The tiny bones (the shaker part) were from the dogs life svg files from myscrapchic.  The left over tiny bones were glued to the card front.  I don't know the make of the patterned paper as it was given to me by a good friend over on UKScrappers.
Thanks so much for dropping on by and for the lovely comments you leave me,
Hugs
H xx

Sunday 20 February 2011

Some clean and simple cards

These cards are an order for a customer.  She is very particular in what she does and doesn't like, and some of these I like others I don't.


The first card :  I used my cricut cart accent essentials for the swirls and one of the very clever Penny Duncan's shapabilities files to cut the middle panels.  The dots in the corner are card candy.
The second card : I have used pearlescent cardstock and my Martha Stewart Double loops punch and large chrysanthemum punch.
The third card : I used a woodware flower punch to make the daisys and cut the name out on my cricut using make the cut software.  The font is monotype corsiva.
The fourth card : I have used some pp from my stash and my double loops Martha Stewart punch

Thanks for dropping by today,
Hugs
H xx.


Saturday 19 February 2011

How to change your blog look quickly

The other day on UKScrappers I asked how people were able to have all these new fonts on their blogs when all I had to choose was the basic 5 or 6.  
Thanks to ellsese on UKS my blog looks different and it was so quick and easy to do.
Here are her instructions:

I use the Blogger Watermark template and this is how changed my text -

Dashboard -> Design -> Template Designer -> Advanced -> Page Text

You can select the font, colour and size of text in this section.
From the Advanced section you can also change the font of your blog posts titles, dates etc.

There are loads of fonts I've never heard of before on the list of choices so plenty to be going at.

I hope these instructions are helpful to you,
Hugs
H xx

Thursday 17 February 2011

Challenge 38 - Monochromaticand not a card for a change

Over on the Tiddly inks challenge blog the theme is Monochromatic Meaning - you choose a colour palette, and your creation must be in only that scheme - including your image! Any color you like!
There are some great DT cards to feast your eyes on if you nip on over.
Last year Mikes Gran was diagnosed with cancer.  She had an operation and they thought they had got it all but 2 weeks ago she was told the cancer had come and she needed to decide if she wanted another operation.  Today she went back to the hospital and they have said they can do the operation via key hole surgery and she's decided to go and have the op.
To celebrate the fact that it's just a small op this time I decided to make her a little something to celebrate.
I loved using the Annie's card image for last weeks card challenge so just though this was a perfect excuse to use her again.  This week instead of doing a card I have done a candle and here it is:


I printed the image onto white tissue paper, coloured with copics and finally drew a heart on Annie's card with my embossing pen and sprinkled gold embossing powder in it and heat embossed it.  I also heat embossed 2 more hand drawn hearts in gold.  I placed them exactly where I wanted them, wrapped the candle in grease proof paper and used my heat gun to heat up the wax slightly so it absorbed the tissue paper.
Mike's Gran was thrilled with and fell instantly in love with Annie, but then who wouldn't.
Thanks for dropping by,
I'll be back tomorrow with a Tiddly card,
H xx

Sunday 13 February 2011

Tiddly Inks Challenge 37 card using a Sketch Saturday sketch

Over on the Tiddly Inks Challenge Blog the theme is All about Love.
I did have a Tiddly Inks image in mind when I was thinking about this card but then I made the mistake (if you can call it that) of wandering around the Tiddly Inks store and fell back in love with all the Annie images so chose to buy Annie's card.  I think she is my favourite Tiddly of all time and know that at some point I will have to own ALL of the Annie stamps.

Here is my card :


And here is the sketch from Sketch Saturday :


Annie is coloured with copics and mounted onto a textured brown oval card stock.  The lime green PP was a freebie from a magazine.The brown strips running down the side of the card were embossed with the hallmark/country companions hearts embossing folder.
The lime green ribbon woven thru the embossed strips is by pebbles.  The sentiment is Lili of the Valley and is stamped in versamagic gingerbread chalk ink.The gems are from papermania and finally the little heart on Annie's card is made from a small heart in the line green PP and a larger heart in the brown textured card stock.  I have covered it with loads of Anita's clear gloss finish which shows quite well I think in the photograph.
This card is for hubby's Aunt and Uncle who's wedding Anniversary on Wednesday.
Thanks for dropping by,
Hugs
H xx

Saturday 12 February 2011

The Clipart Fairy - Challenge Number 1!! And Simply Create entry

I found out about The Clipart Fairy after buying one of her Book a easel cd. Which if you haven't seen it, quick click on my link and head over, it's brilliant.
For her very first challenge she has set the theme of Love is in the Air, where you must use her products only and include a heart and a semi-circle.
Well you know when you have an idea and no matter what's going on you just have to do it, well this card was one of those things.
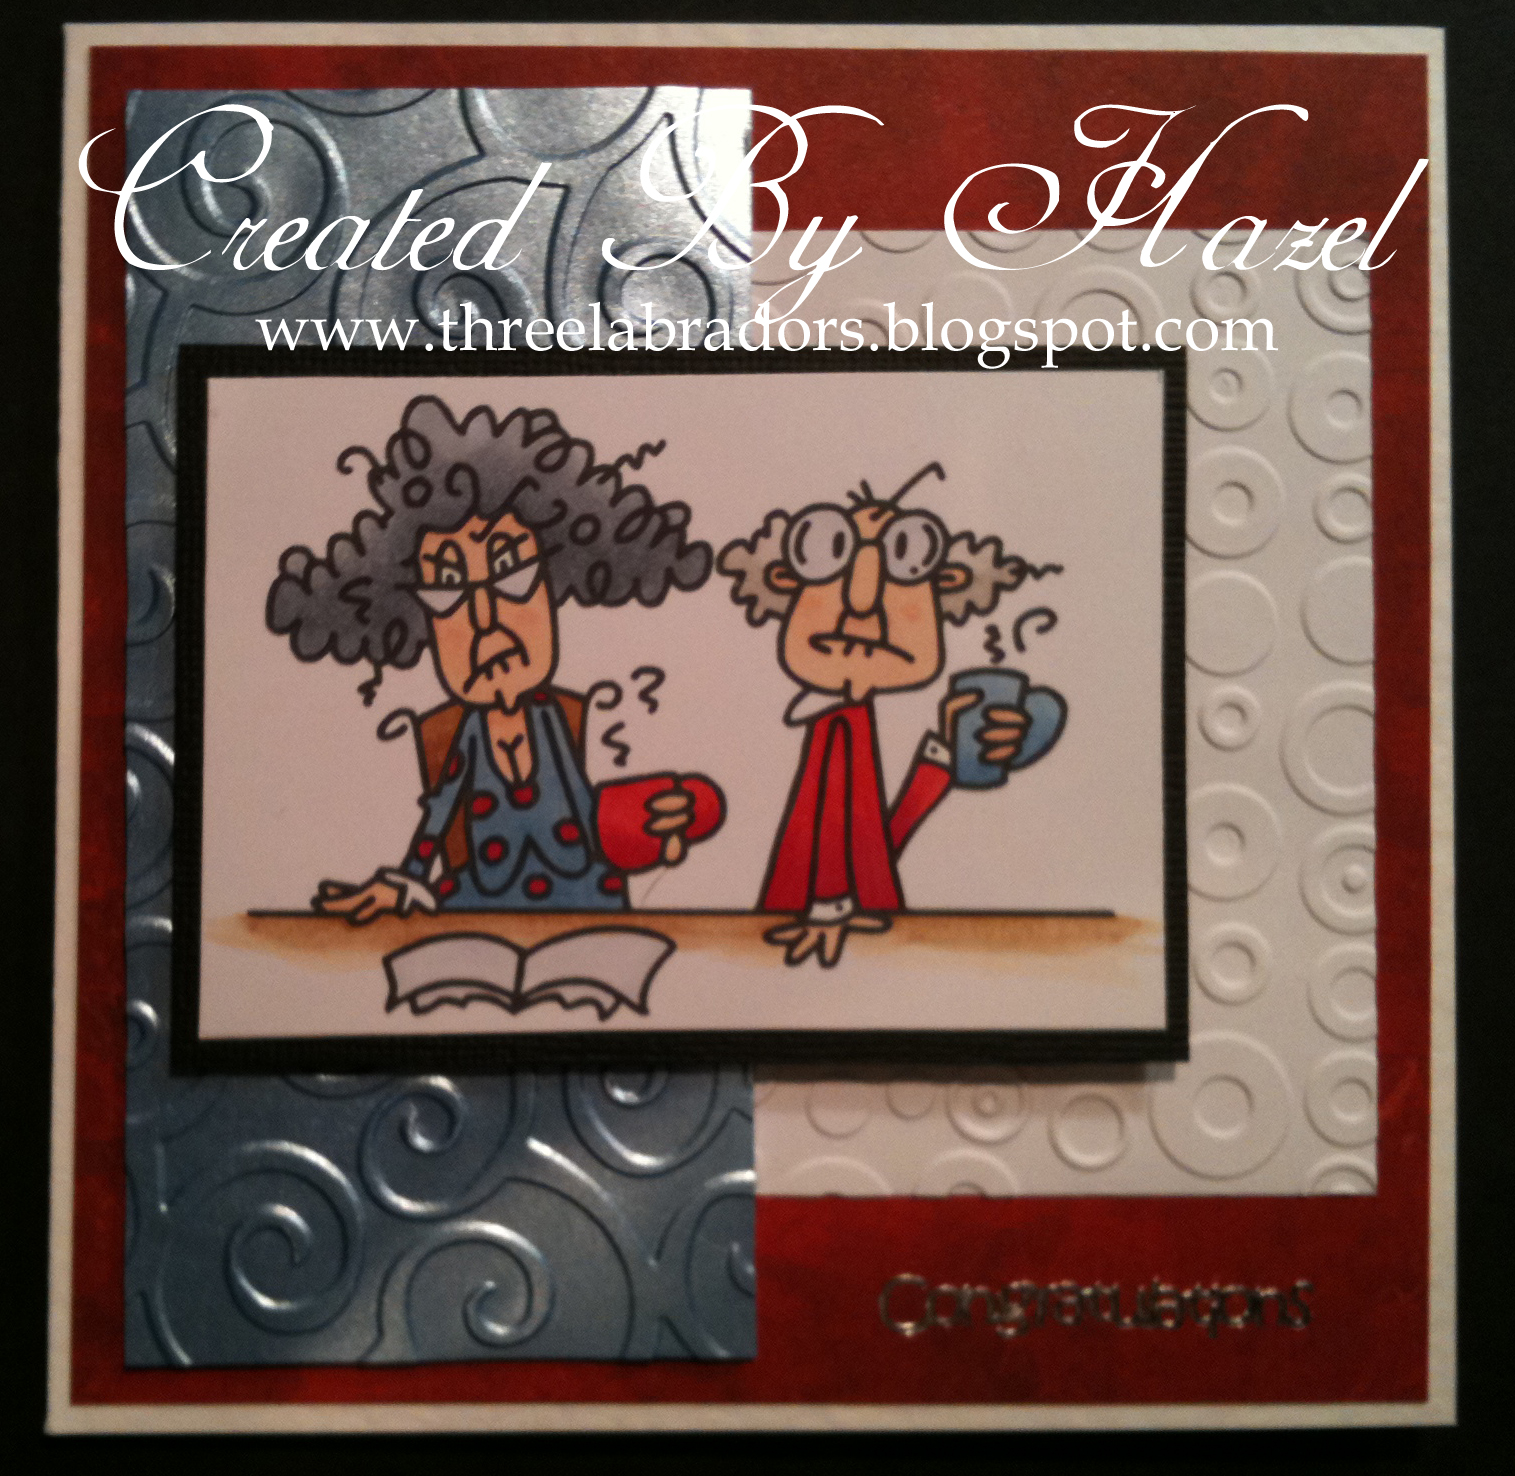

Over on Simply Create blog you have to use the following design board for inspiration:


Here's my card:


The idea for the card came from a wedding invite I was shown by one of my best friends Kath.
The image in the middle flips so shows the image on one side and the sentiment on the reverse.
This card took many many hours to figure out but I am very pleased with the result.
The image is coloured with my copics and is mounted on the brown flipper card.
The sentiment was printed and then the two hearts were stuck on.  They were left overs from a card I made the other day. I then cut a 9cm circle in the PP and a 10cm circle in brown on my cricut.  They were cut in half then trimmed to fit on the sides of the cards.
The card is finished as usual with card candy.
When my hubby and I were saving for our honeymoon he sold all his fishing tackle so we had spending money so when the idea of using the nice tackle sentiment popped into my head I immediately thought of him.
I hope he likes it.  He better had it seemed to take me forever to make.
Hugs
H xxx

Friday 11 February 2011

Pollycraft Challenge #79 Sketch By Maria and LOVE theme

If you nip over to the Pollycraft shop you can pick up the cutest critter.  I used him to make a card for my Dad to give to my Mum for valentines day.
Here is my card followed by the sketch designed especially for this challenge :


I didn't have any lace so I used a strip from a paper 2x12 stack.  The image is coloured with my copics and the black card was brushed with a fine coating of mica powders to add some sparkle.
The sentiment was written on my cricut using my new cri-kit pens.  Not 100% sold on these yet but i need more time to test them out properly.
Card finished as usual with card candy in black and metallic red.
Thanks for dropping on by and for all your lovely comments, I read everyone of them, thank you,
Hugs
H xx

Thursday 10 February 2011

My gorgeous doggy mini-book

After finally getting my card orders completed I got to bind the most gorgeous mini-book made for me by Suzy. You can go and visit her blog by clicking on here.
She made me just the perfect book for me to display photos of my three labradors Zara, Max and Leah.
As I have so very many photos of my three its going to be a big job choosing the ones to fit in my book and hopefully I can get them picked and ordered this weekend.
I was going to wait and show you the book once it was complete with photos but I couldn't wait so here it is:


Thanks for dropping by and letting me show off,
Hugs
H xx

Wednesday 9 February 2011

Bugaboo and cute card thursday challenge card

I needed to make a retirement card for my Dad's cousin and his wife and needed it to be a funny one.  I remembered there were some great funny images over at Bugaboo Stamps.  She has an amazing selection of images and it's well worth checking them out.
Here's my card :


The red PP is a Bo Bunny one but I can't remember the name.  The white and blue papers are from my scrap bag and have been embossed with some cuttlebug folders.
The inside of the card reads "when you stop lying about your age and start lying around the house, you are retired."
Thanks for dropping around,
H xx

Cute Card Thursday and Sketch Saturday humorous card

I needed to make a card for a friends 60th birthday card and I knew just the image I wanted to use.  I picked a Doodle Dragon Studio image of the very cute zebra that I chose to colour in purple.  Well, why not??
I used the sketch from Sketch Saturday to do the following card:


And this is the sketch 


I am also entering my card for Cute Card Thursday who want to see your humorous cards.
I used two cuttlebug embossing folders on some scraps of paper and the PP is from a magazine.  The two thin strips are purple glitter paper that have been at the bottom of my scraps bag for quite a while now.The holographic word sixty was cut on my cricut using MTC and cheri font.
Thanks for dropping by,
Hugs
H xx

Doodle Dragon Fisherman birthday cards

On Sunday my nieces fiance turns 24.  He is a keen fisherman and so both cards needed to show a fisherman.
I immediately opened my Doodle Dragon studio digi stamps (I have 100's of his images), and very soon found 2 very good images to colour up.
Here are Jon's cards :


Yesterday I did a big spring clean of my craft stash and so these cards are made with either scraps of papers from my scrap bag or they are papers from the simply cards and papercrafts magazine.
I used one of my cuttlebug embossing folders on the cream card on the top cards and my favourite embellishment of card candy on the bottom card.
Thanks for stopping by,
H xx

Monday 7 February 2011

Lili of the Valley Challenge 83 - ROMANCE

I first coloured this image to show my niece to see if this was the type of image she wanted on her wedding invitation.  She loved it immediately and now the image is being used for her wedding stationary.
The challenge over at the Lili of the Valley challenge blog is to create a project with the theme of romance.
Here is my card :


I used the following sketch from the Friday sketchers blog :


The image has been coloured with copics and I added some glamour dust to the back of her dress.
The two hearts on the image were cut from the make the cut gallery on the cricut.  The large red circle is cut from red kanban textured mirri card from the accent essentials on the cricut, with the shadow cut from black textured cardstock.
The red ribbon running down the centre of the card has small hearts on it and it came from the market.  And finally the PP was kindly given to me by my very good friend Kath, thanks Kath, and I coloured some of the heart petals with my sakura stardust pens.

Sunday 6 February 2011

Lili of the Valley 60th Birthday Card

I was asked to make a 60th birthday card so I decided to use colours that I rarely use, yellow and orange.
The card has took me about 2 hours as I struggled to to an a5 sized card as I'm so used to doing 14cm square cards.  My reward for using my least favourite colours was I used some of my scrummy  Bo Bunny paper.
Here's my card:


The cute little girl is called Rosie with presents from Lili of the Valley.
She is coloured with copics, with a little sparkle from glamour dust and a sakura clear stardust pen.
The sentiment is printed from my pc (can't wait til I get my cri-kits pens).
Both are mounted on yellow textured card stock and then I used versa magic chalk ink in thatched straw to blend around the edges. The swirly corner bits are from a set of Christmas spellbinder shapabilities.  The ones on the sentiments are the cut-outs from the ones around the image.  The PP is Bo Bunny flutter butter honey and the strip across the middle is an off-cut from my scraps.  The card is finished with Anita's glitteration gold glittered strips.
Thanks for stopping by, I'm off for a good old blog-hop while hubby watches the footy,
H xx

Friday 4 February 2011

January's Circle Journal Entry

Yes I know it's February but I'm running a bit behind and finally got it finished today so it can be posted tomorrow.
January's CJ was entitled Dream Destination.  Here are my pages, I think they are self explanatory.


The title was cut on my cricut using Make the Cut software and the Cheri font.  The car was cut on the using the paper dolls cricut cartridge. The embossed stars were done using a crafts too embossing folder.
Thanks for stopping by and for those who left some very kind comments yesterday after I posted photo's of our beloved dog Lady your thought really touched our hearts and I will be forever thankful to you all,
Hugs
 H xx

Thursday 3 February 2011

Our Lady Jane

Today has been a very sad day. We had to take the decision to put our very old Labrador Lady to sleep.
Lady has had a very full life including being one of my bridesmaids over 10 years ago and also featuring on the front page of our local paper when the fire brigade had to be called to rescue her from the roof of an old house. She was at least 18 years old and up to the end was very feisty. She went to sleep on her bed in my arms and is now buried up the field at my parents farm along with a hen that died overnight.
Here are some of our favourite photos of her.


- Posted using BlogPress from my iPhone

Wednesday 2 February 2011

Challenge 36 - Kiss Me, You Fool

This week's challenge, #36, is called Kiss Me, You Fool!! As we gear up for the fabulous St. Valentine's Day holiday, your creation must incorporate a kiss either in your sentiment or imagery.

Last week I bought one or two (alright seven) tiddlys and this one was the perfect image for this weeks challenge.  The colour scheme comes from one of the card candy selections that came in my Card Candy store that my Parents got me for my birthday.  I have also used this sketch to design my card:


The svg file I used to cut the bracket card came from this collection over at My Scrap Chic.  She has a whopping 60% off that ends tonight so head over there quick to grab a bargain.
Here's my card:


The sentiment used on the easel card stopper read's " A kiss from you, makes life worth living."
The image is called Hedgie Hugg Girl and you can find her here.
The image has got a dotted border of brown metallic sakura pen and pink skaura star dust pen.
The PP is just from my stash and the card is finished off with gorgeous card candy.

Thanks for stopping by and before you nip off, I'd like to show you my new Tiddly Inks top 5 bag that I won last weeks challenge card.


Hugs
H xx

LinkWithin

Related Posts with Thumbnails